WE MOVED to WWW.STUFF-BY-ASH.BLOGSPOT.COM
WE MOVED!! COME OVER FOR EVEN MORE GREAT IDEAS!

WWW.STUFF-BY-ASH.BLOGSPOT.COM


Showing posts with label Happy Fall Y'All. Show all posts

Thursday, October 28, 2010

Pumpkin Reverse Appliqué T-Shirt

178_0189

{Supplies}

178_0118 Coordinating thread
Small SHARP scissors
Fabric (orange and green)
T-shirt (I actually found mine at the Dollar Store)
Pins
Pattern/Picture
Ribbon
Embroidery thread (green)
Sewing machine


{How To}

178_0120

Cut a square out of the orange fabric, big enough for you chose pattern and then some.  Pin orange fabric on the INSIDE of your shirt, wherever you want your pumpkin to be.  We choose the top center, on the chest. 

178_0121

Pin your pumpkin picture onto the FRONT of the shirt, printed mine of the internet.  I actually did a Google search for “pumpkin appliqué” and got a lot of great results. 

178_0122 178_0123 178_0124Sew around the outside of your pattern, VERY CAREFULLY!  This pumpkin had a bit too many small curves for me, so instead of unpicking my horrible sewing and trying again, I sewed around my pumpkin five or six times, trying to sew close to what I’d already sewed but not right on top of the stitching.  In the end, I liked the look this gave. 


178_0125

Be careful not to sew the back of your shirt to the front, or the front to the back.  I did not once, but twice!  Only sew the front of the shirt, otherwise you won’t be able to fit a little person in there!!

 178_0126178_0128 Here is what my shirt looked like, remember the orange fabric you pinned the back, obviously you want to be able to see that so here’s what you’re going to do next:


 178_0129 178_0130 178_0131178_0133Using your small sharp scissors, carefully cut on around the inside of your stitches.  Getting as close as possible to them, with out cutting them.  

Now you have your pumpkin, but it needs a stem.  I wanted my stem to go behind my pumpkin, so this is what I came up with:

178_0134Cut a little slit at the top of the pumpkin, but not through the stitches, just above them.   178_0135To make my stem I used a piece of brown ribbon, cut, folded in half, sewed together the open edge.  This will go on the inside of the shirt, so you won’t see it.  So I didn’t worry about hiding seams, or as you can see changing my thread color.   178_0136Insert sewed end of ribbon through the slit so that the sewed end is inside the shirt 178_0137 178_0138Pin and sew on top of the ribbon, I tried to blend this in with the stitches I already  sewed. 

Pumpkin, check.  Stem, check.  Now for the leaf and vines.  178_0139Cut out two leaf shapes, place wrong sides together, sew around the edges, turn right side out.   178_0140Put some of the leaf in that slit you made to make it look like it’s coming from the pumpkin and the stem.   178_0143178_0145To sew my leaf onto the shirt, I used coordinating embroidery thread, sewed up the middle and around the edges.  As you can see I did not to a great sewing job with the machine, but I thought it helped the leaf to match a little better so I left it.  178_0146 178_0147 As a finishing touch I used the same green embroidery thread and stitched on a few swirly vines.  

   178_0152Pretty happy with my finished product, and it even survived the wash.  I had fears it would completely come apart, but it made it!  My pumpkin was a little bumpy, which added character to a pumpkin, but wouldn’t look so great if it was an initial or something.  So my tip would be, chose something with a simple shape that will be easy to sew around.  And make sure when you are pinning you get everything nice and flat and tight.  Oh, and it was super fast, it took me about an hour from start to finish. 


178_0156178_0159

I’m excited to make some different versions using this technique, Wal-Mart has a ton of plain long sleeved shirts for $3 right now!


For more help and tips you can visit:
Crafting in the Closet and Sugar Bee Craft Addition


A Glimpse Inside featured buttongiveaways

Saturday, October 9, 2010

Fall Pillows

I am lov-ing these two pillows made by Gwenny Penny.  I think one, if not both of them will be my next sewing project.  And they are both fallish and not too Halloweeny that I could leave them out until Thanksgiving!

image Pumpkin Pillow by Gwenny Penny


image 
Tree Pillow by Gwenny Penny

Friday, September 10, 2010

Just For Fun

Today because it’s Friday.

Because I chased after the Garbage Truck trying to explain that we’d forgotten to put out our garbage can!  We’re new at this whole living in a real house thing.

Because The Two Year-Old, oh that loveable little bug!  She’s learned to wiped her mouth on her shirt, and she’s wearing pumpkin socks and ladybug pjs. 

I thought I’d share some things that have made me chuckle today.


image image

The Pioneer Woman is featuring funny photos over at Pioneer Woman Photography.  These were two of my favorites!  I had no idea cats could make such facial expressions. 


Brian Regan ALWAYS makes me laugh!


image

So true!


image

And last but not least, these aDORable candy bracelets!  I am making one for The Two Year-Old and one for me!  {Found @ Eighteen25}

Monday, September 6, 2010

Fall Trees

I have been wanting to add to my Fall decorations.  Two ideas that I have found and love are:

A handprint tree by Embellishing Life

image 

And

A Button Tree by Inspiring Creations

image

I think I am going to combine them into one, like us my little one’s handprint, but then us buttons for leaves . . . My wheels are still turning . . .

What is your favorite fall decoration (that you’ve made/have, or just seen and want to have/make)?

Wednesday, September 1, 2010

Carmel Apple Cupcakes

It’s the first day of September and Fall is coming, here in northern Utah it hasn’t quite arrived but it is coming.  And with the coming of Fall I always am reminded of the smell of cinnamon and apples.   

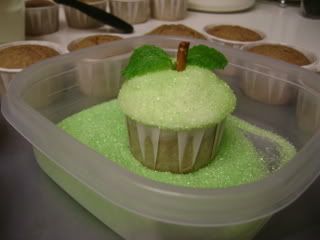
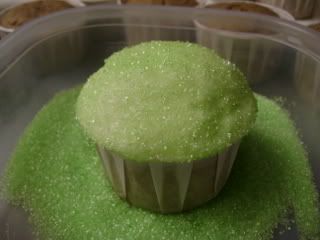
Today I found the most wonderful cute Carmel Apple Cupcakes.  Imagine with me, apple flavored cupcakes, filled with carmel, topped with cream cheese frosting, all decorated like a cute little apple!  I cannot wait to make these!  I just have one question, does anyone know where to get those paper cupcake cups for cheap?

image

Carmel Apple Cupcakes by I Heart Cupcakes

Makes 12 cupcakes (I got 16)

INGREDIENTS

For apple cupcake
2-3 apples, granny smith (I substituted 1 cup unsweetened applesauce)
2 cups all-purpose flour
1/2 cup sugar
1 teaspoon ginger
1 teaspoon cinnamon
1/8 teaspoon nutmeg
1 teaspoon baking soda
1/4 teaspoon salt
2 large eggs
1/2 cup oil
1/4 cup apple juice
1 teaspoon vanilla

For caramel
2 cup sugar
1/2 cup water
1-1/2 tablespoon light corn syrup
2/3 cup heavy cream
2 tablespoon unsalted butter, room temperature

[NOTES: Caramel recipe makes a good amount. You might want to 1/2 it or you can refrigerate any leftovers for ice cream topping or other dessert topping. Just microwave it in intervals until you get the right consistency.]

For cream cheese frosting
8oz cream cheese, room temperature
1 cup (2 sticks) butter, room temperature
1 vanilla bean, cut lengthwise and scraped
1 lb (~4 cups) powdered sugar, sifted

pretzels
green sprinkles
mint leaves
black sesame seeds

[NOTES: I prefer green (granny) apples when I think of caramel but you could easily use red sprinkles for a shiny red apple too!]

INSTRUCTIONS

To make cupcakes—

Preheat oven 350F.

Rinse and core the apples. Place them on an ovenproof pan or baking sheet and bake for 30-40 minutes until soft. Remove the apples from the oven, let cool slightly, then remove peel and mush the apple with the back of a fork. Measure out 1 cup of apple mush and set aside to cool.

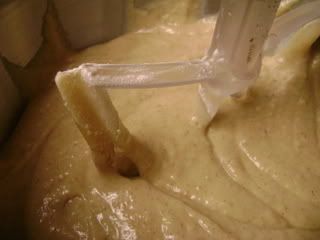
Combine flour, sugar, ginger, cinnamon, nutmeg, baking soda, and salt in a medium sized bowl and whisk to combine. Crack the eggs into a separate, medium sized bowl and beat with a form to break up. Add the oil, apple juice, vanilla, and cooled apple mush and mix to combine. Combine the wet and dry ingredients until all ingredients come together.
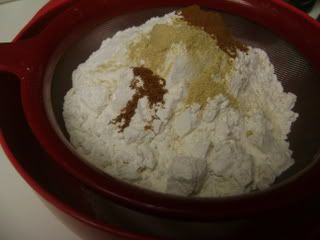
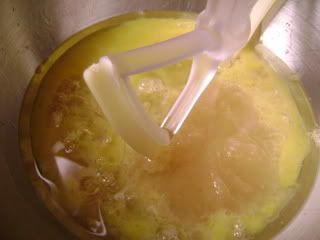
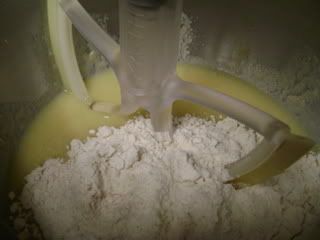
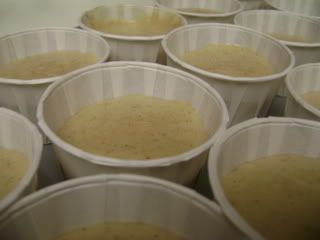
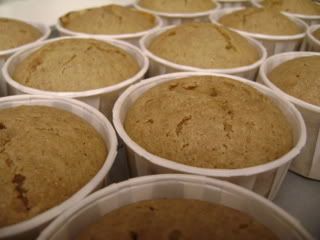
Scoop into cupcake papers about 2/3 full. Bake in 350F oven for 20-22 minutes, rotating the pan after 15 minutes, until a toothpick comes out clean.
 To make caramel—
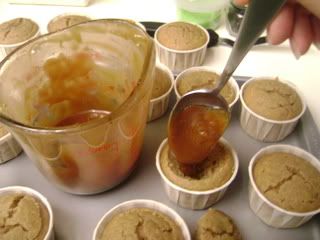
Put sugar, water and corn syrup in saucepan, stir just to combine ingredients. Turn to medium-high heat, without stirring, for 5-10 minutes until caramel turns an amber color. Wipe down any spatters with a pastry brush dipped in cold water. Lower the heat a little and add the cream and butter. (Caramel will bubble!) After the bubbling decreases, stir caramel to break down lumps. Pour into a pyrex measuring cup to cool.

You can see caramel pictures on my food blog.

To make frosting—
Whip the butter and cream cheese together in a mixer fitted with a paddle attachment until creamed. Add vanilla beans. Gradually add powdered sugar. Scrape down the bowl as needed.

To assemble cupcakes—
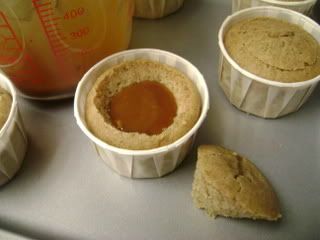
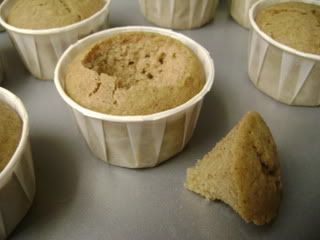
Fill cupcakes with caramel using the cone method.
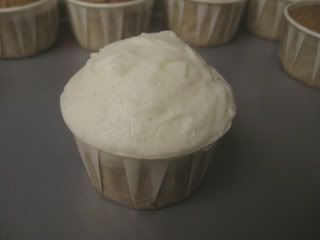
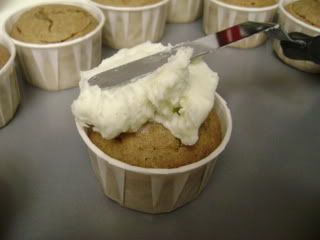
Dollop a fairly good amount of frosting and shape into a spherical shape.
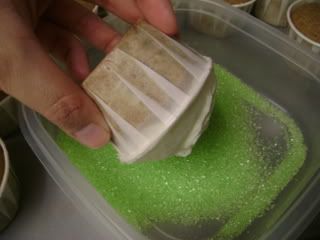
Roll cupcake in green sprinkles to cover the frosting. Break off pretzel and stick into the top to resemble a stem. Insert a mint “leaf” in the frosting near the stem. Notch out a “bite” shape and arrange 3 sesame seeds to resemble apple seeds.
ENJOY!

Husband rating: A
He really like the apple cupcake but not a huge fan of the caramel center. He loves that cream cheese frosting but not with the sprinkles. I think its a texture thing for him.

Wifey rating: A/A+
I loved the flavors of the apple cupcake with the caramel and cream cheese frosting. And who knew that pretzels with cream cheese frosting was so good?? HAHA. I realize that the apple may not be anatomically correct but I think the seeds are pretty darn cute anyways.

So cute, thank you I Heart Cupcakes for sharing!


If you are looking for more great Autumn Cupcake ideas, head over to Party Cupcake Ideas for a list of 25 Autumn Cupcakes.

WE MOVED to WWW.STUFF-BY-ASH.BLOGSPOT.COM